

Using Workbooks with Legal Assist AI
Workbooks
Welcome to the guide on using Workbooks in Legal Assist AI. This guide will walk you through the necessary steps to create and access workbooks. Follow along to make the most of this powerful software.
Go to legalassistai.me
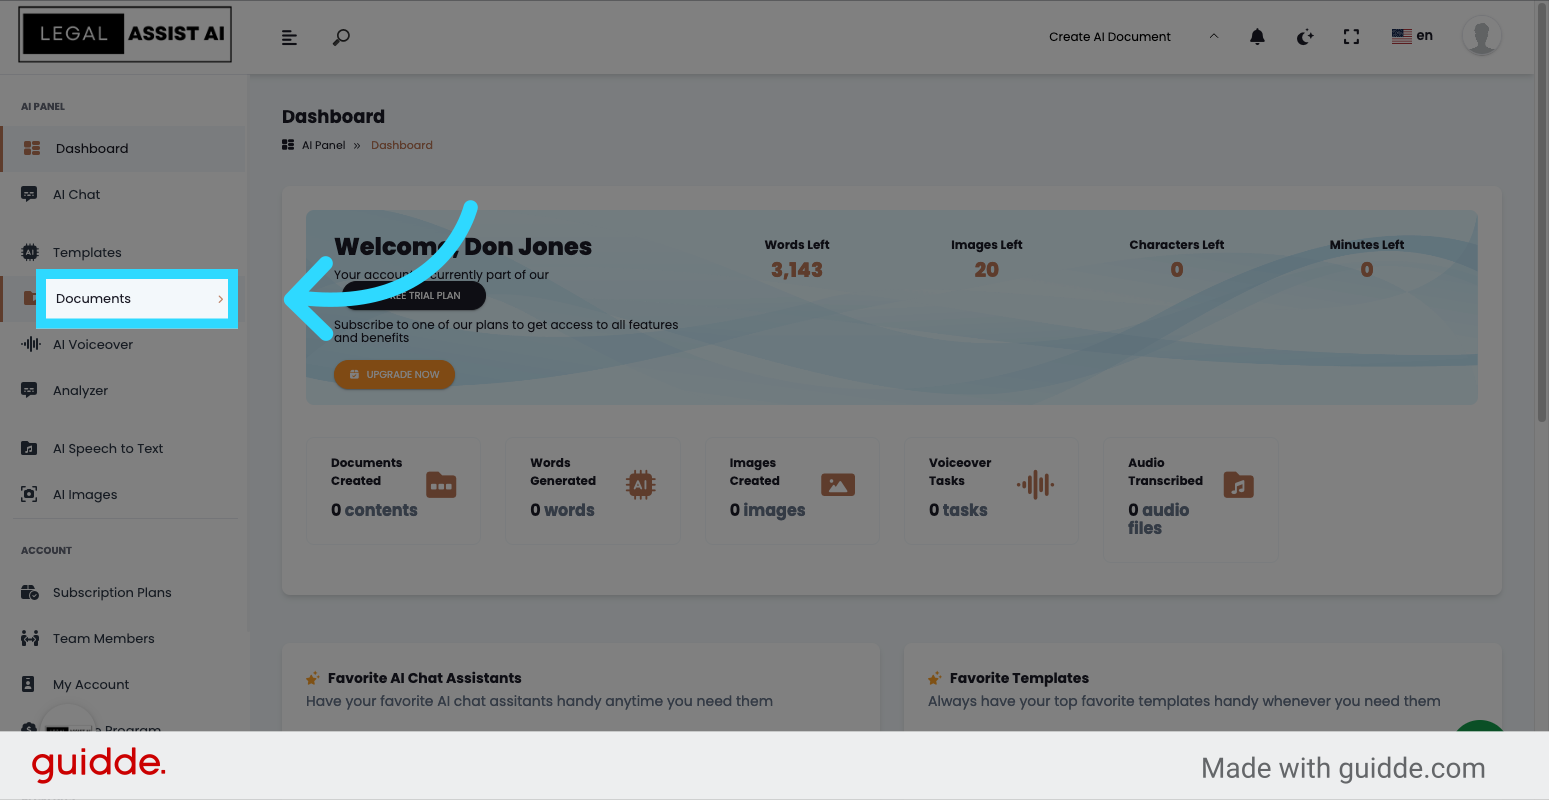
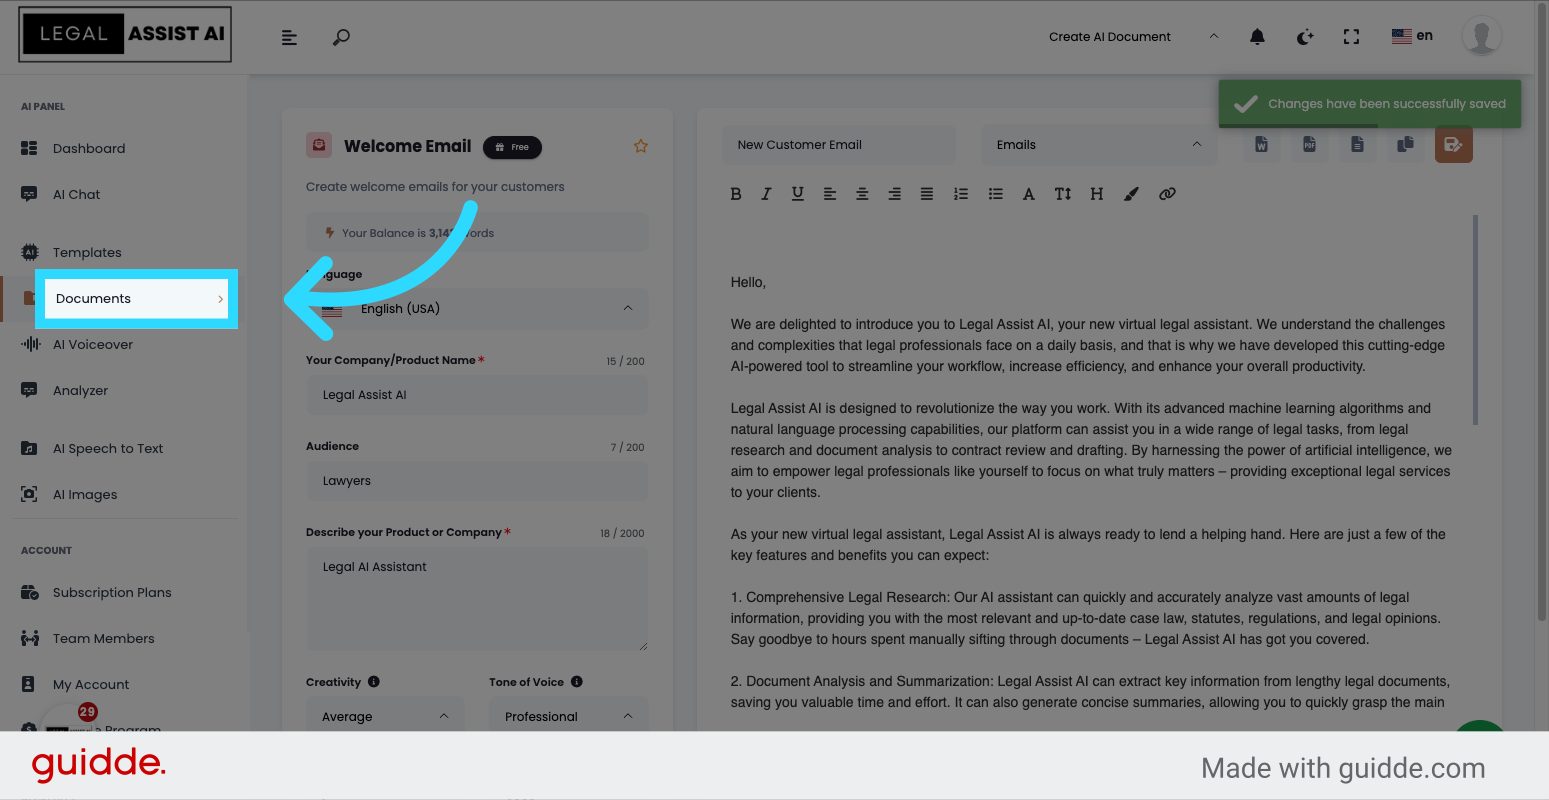
1. Click “Documents”
Click on the “Documents” tab to access your workbooks.
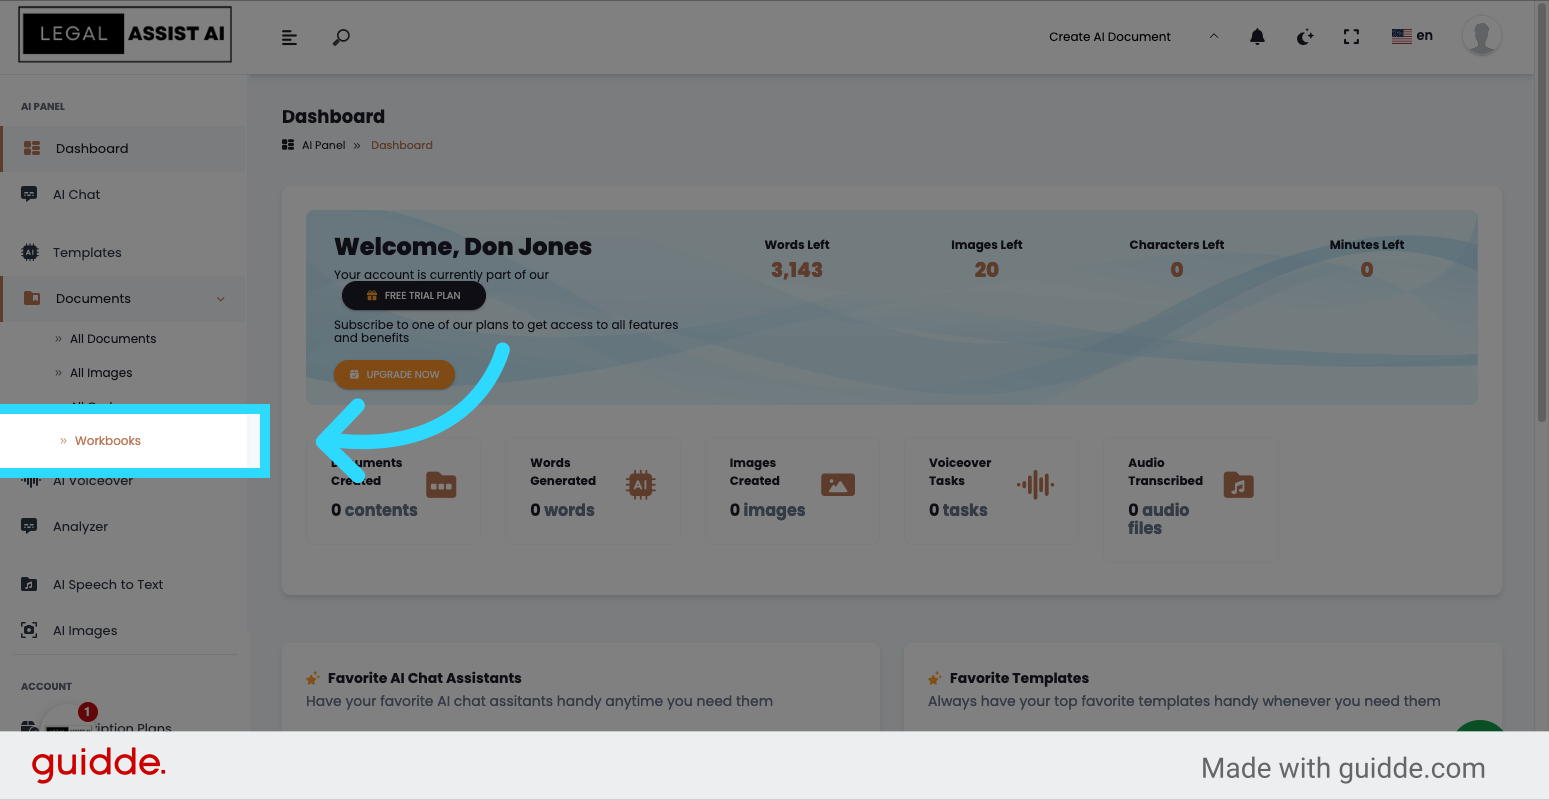
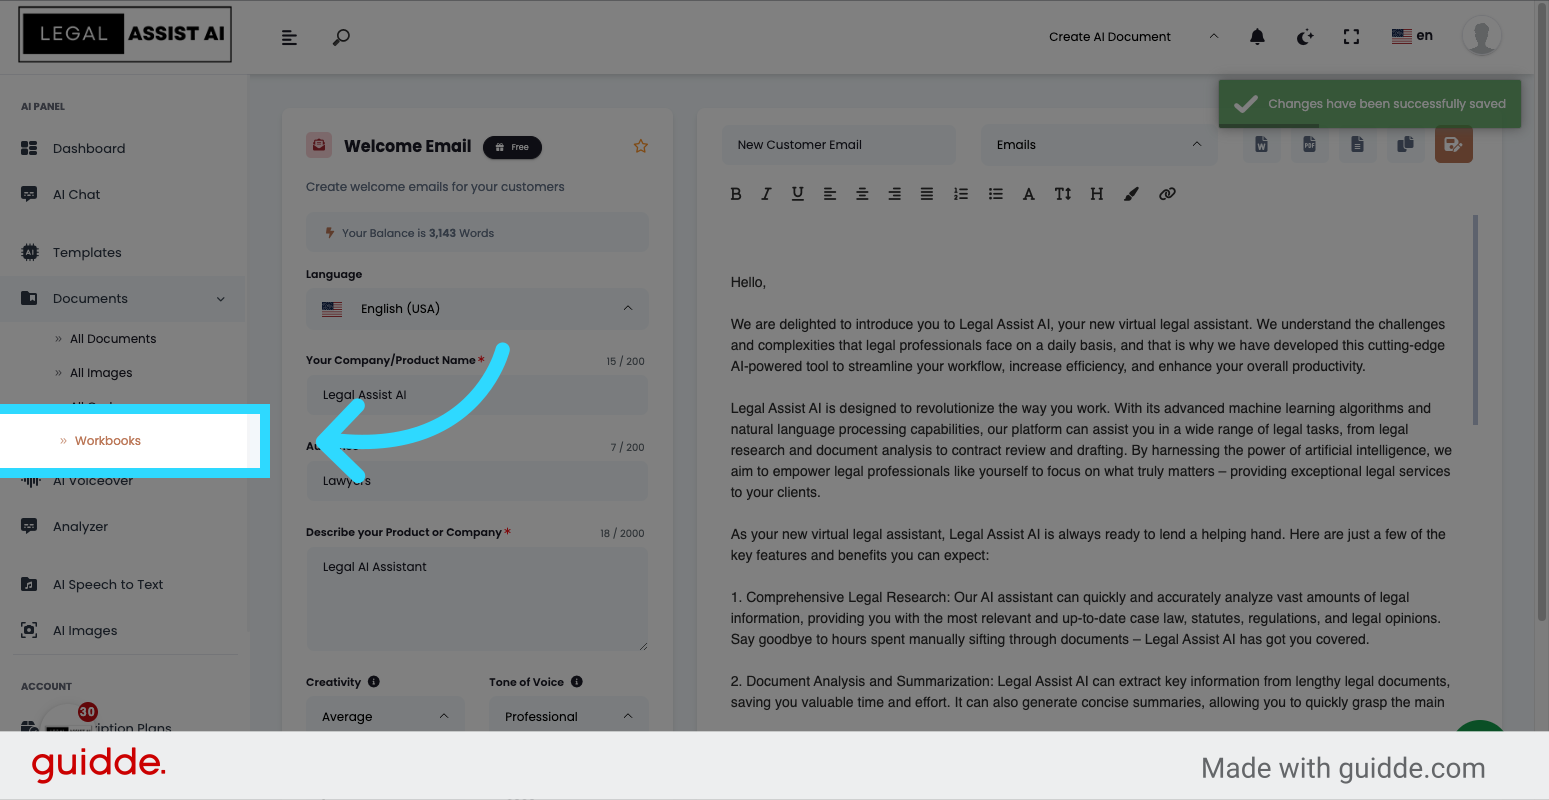
2. Click “Workbooks”
Next, click on the “Workbooks” option from the menu.
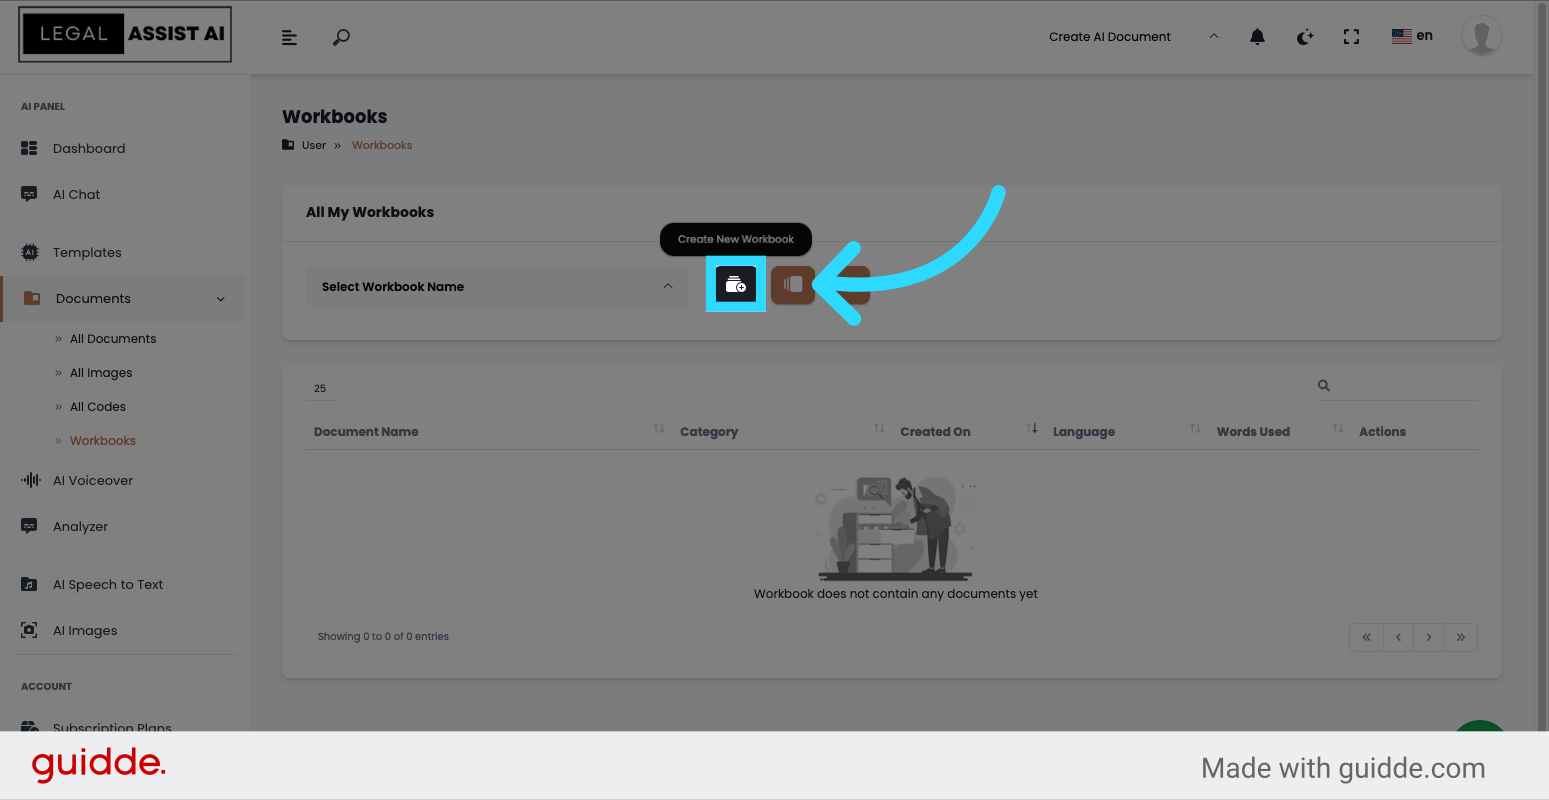
3. Click here
Click here to create a workbook
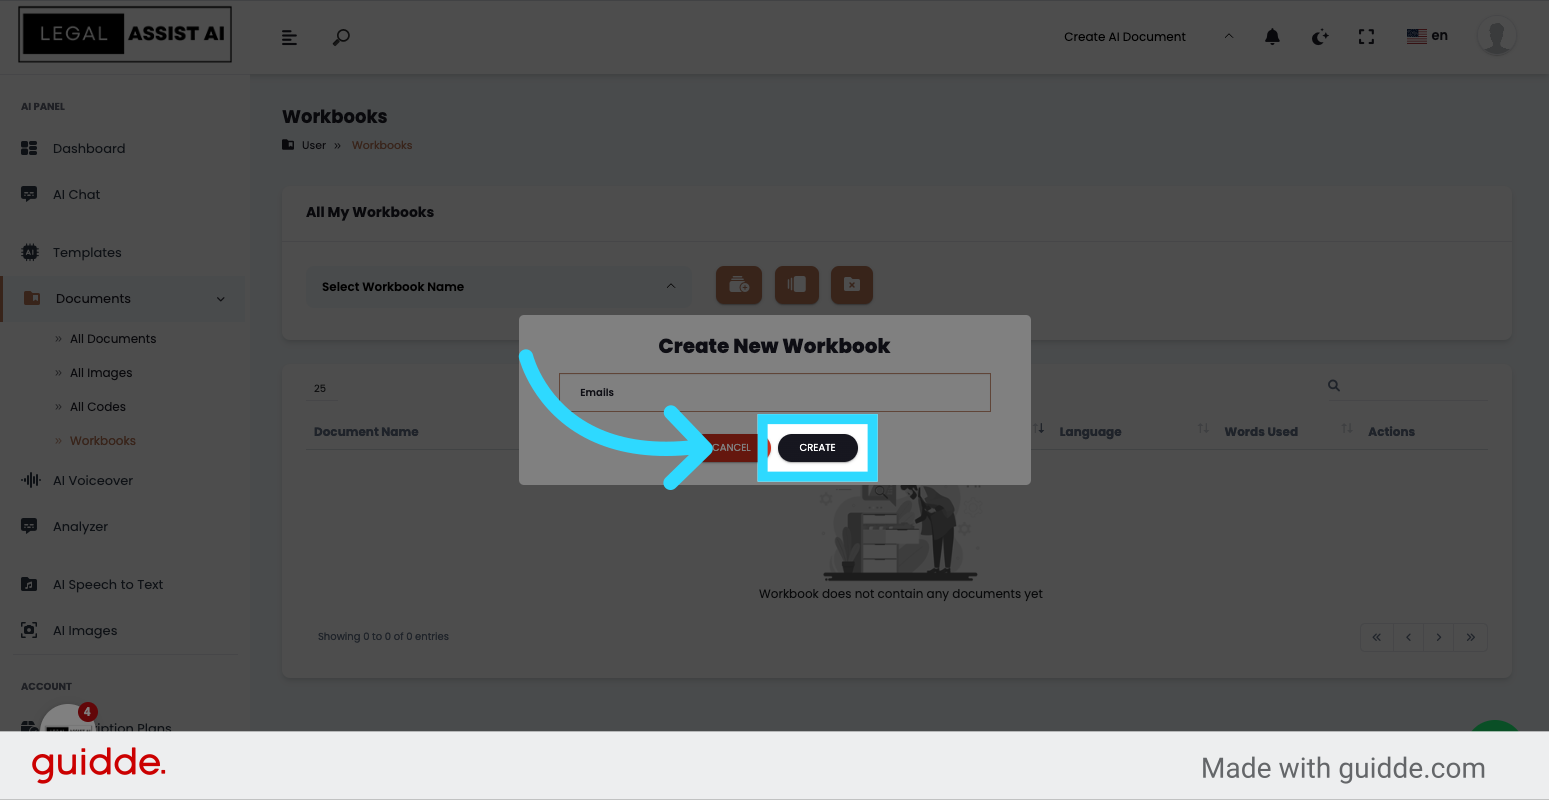
4. Fill “Emails”
Enter here the name of the workbook to be created.
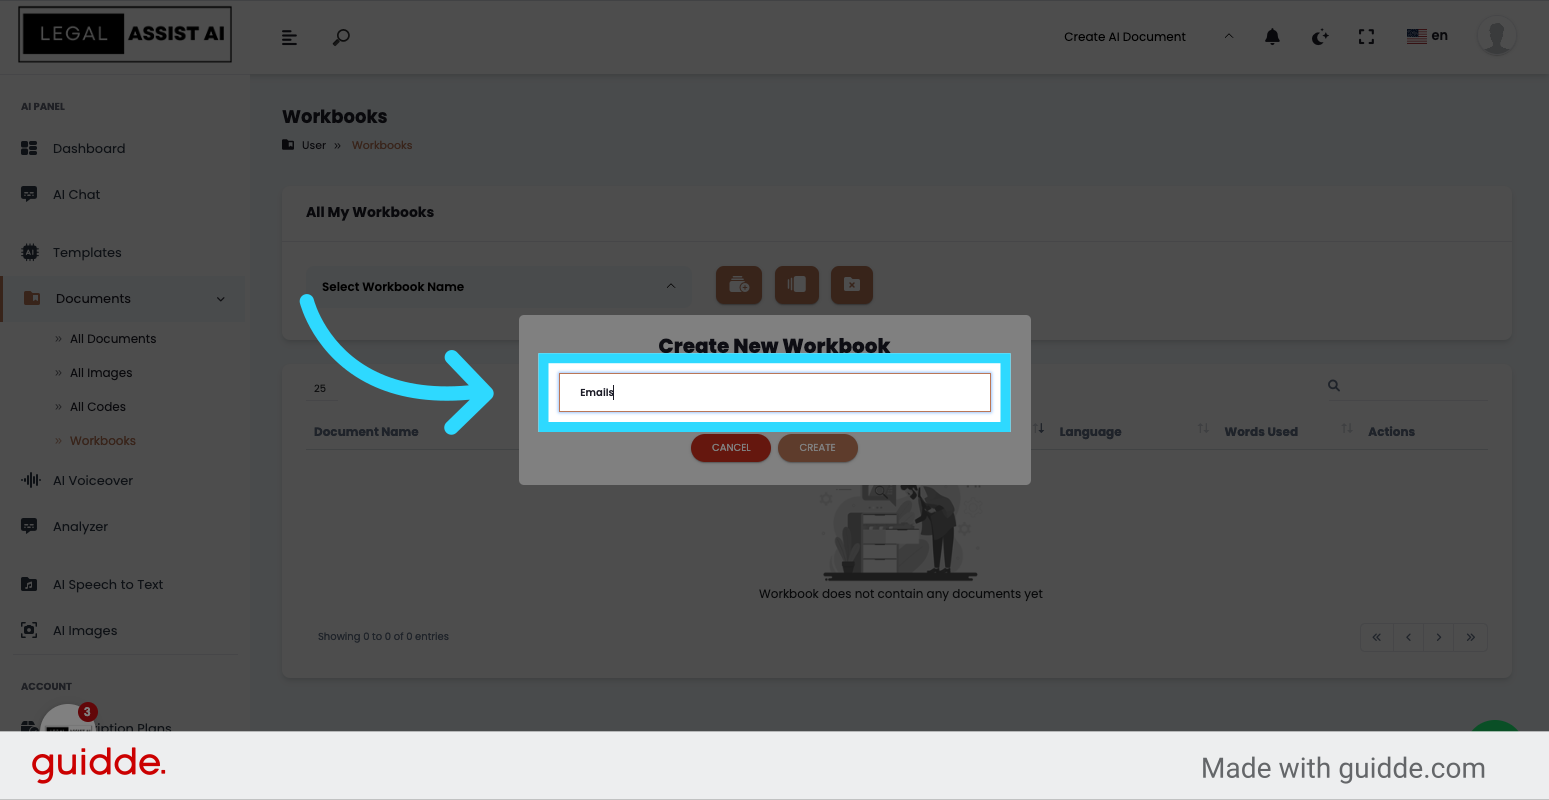
5. Click “Create”
Click on the “Create” button to proceed.
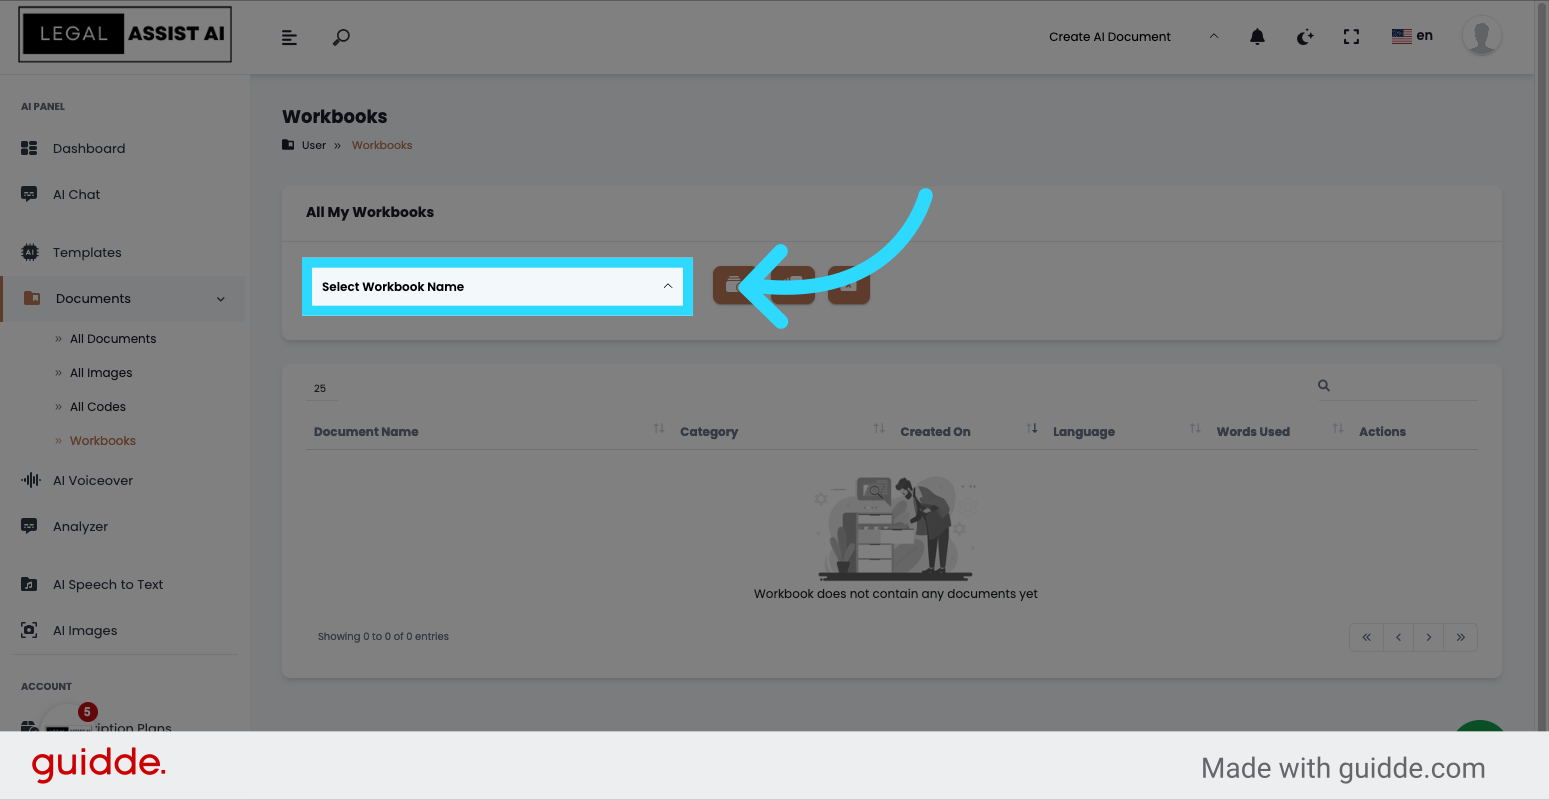
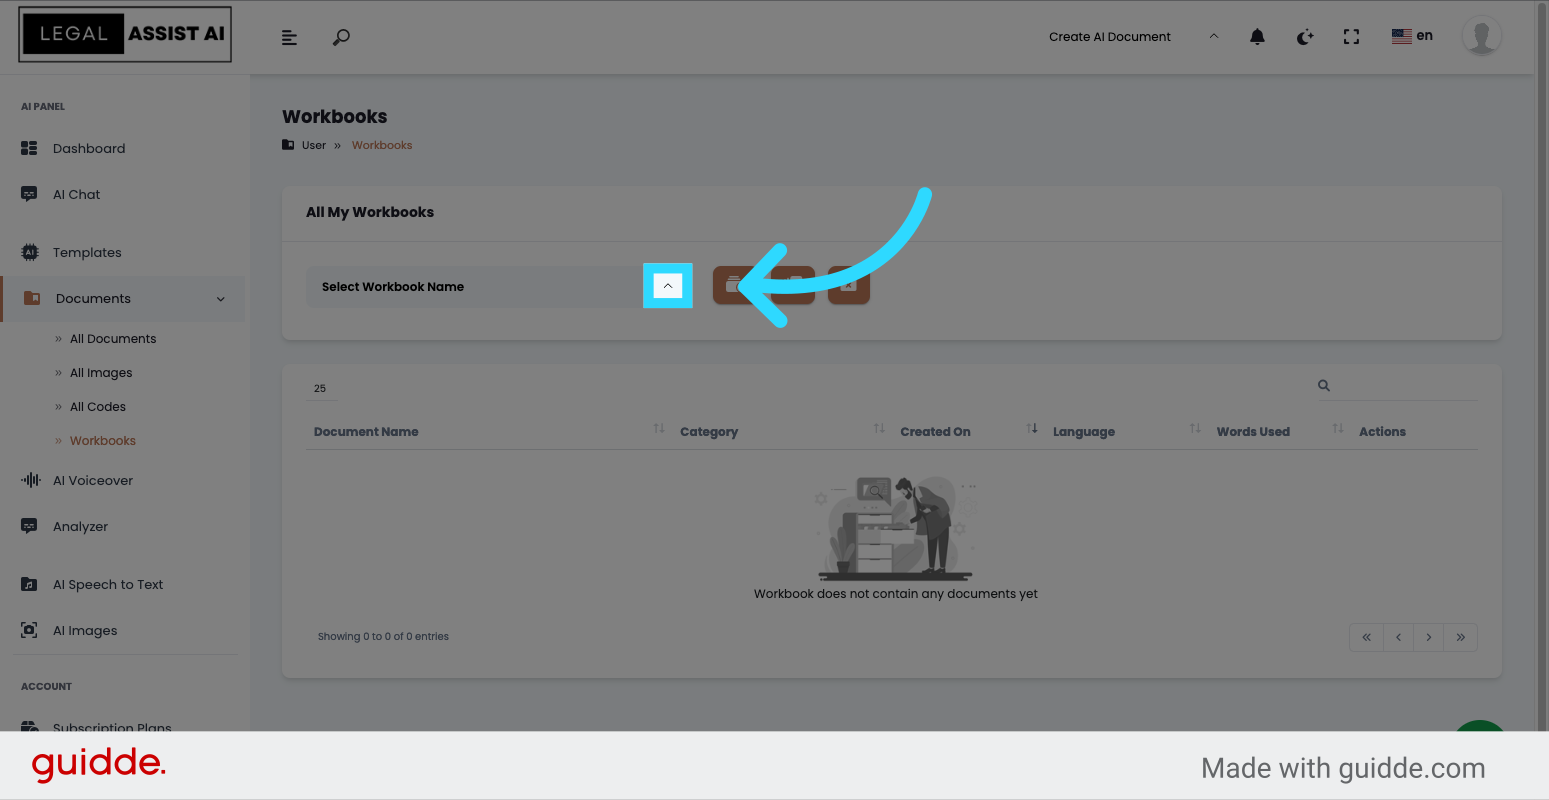
6. Click “Select Workbook Name”
Next, select the newly created workbook name from the options provided. This will confirm the creation of the workbook
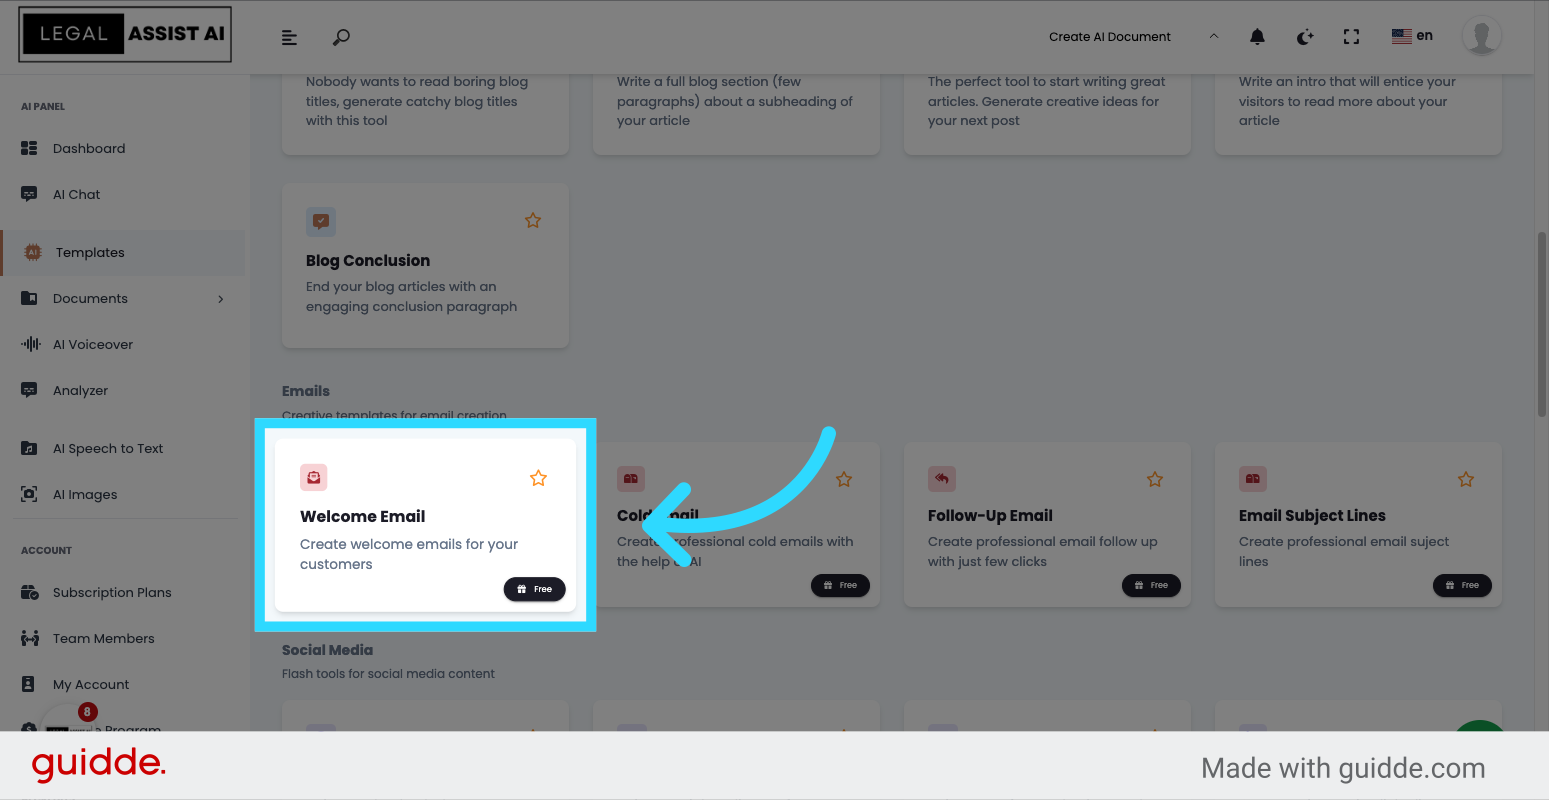
7. Click “Templates”
Click on the “Templates” tab to access the available templates.

8. Click “Welcome Email Create welcome emails for your customers Free”
Select the “Welcome Email” template to create personalized welcome emails for your customers.
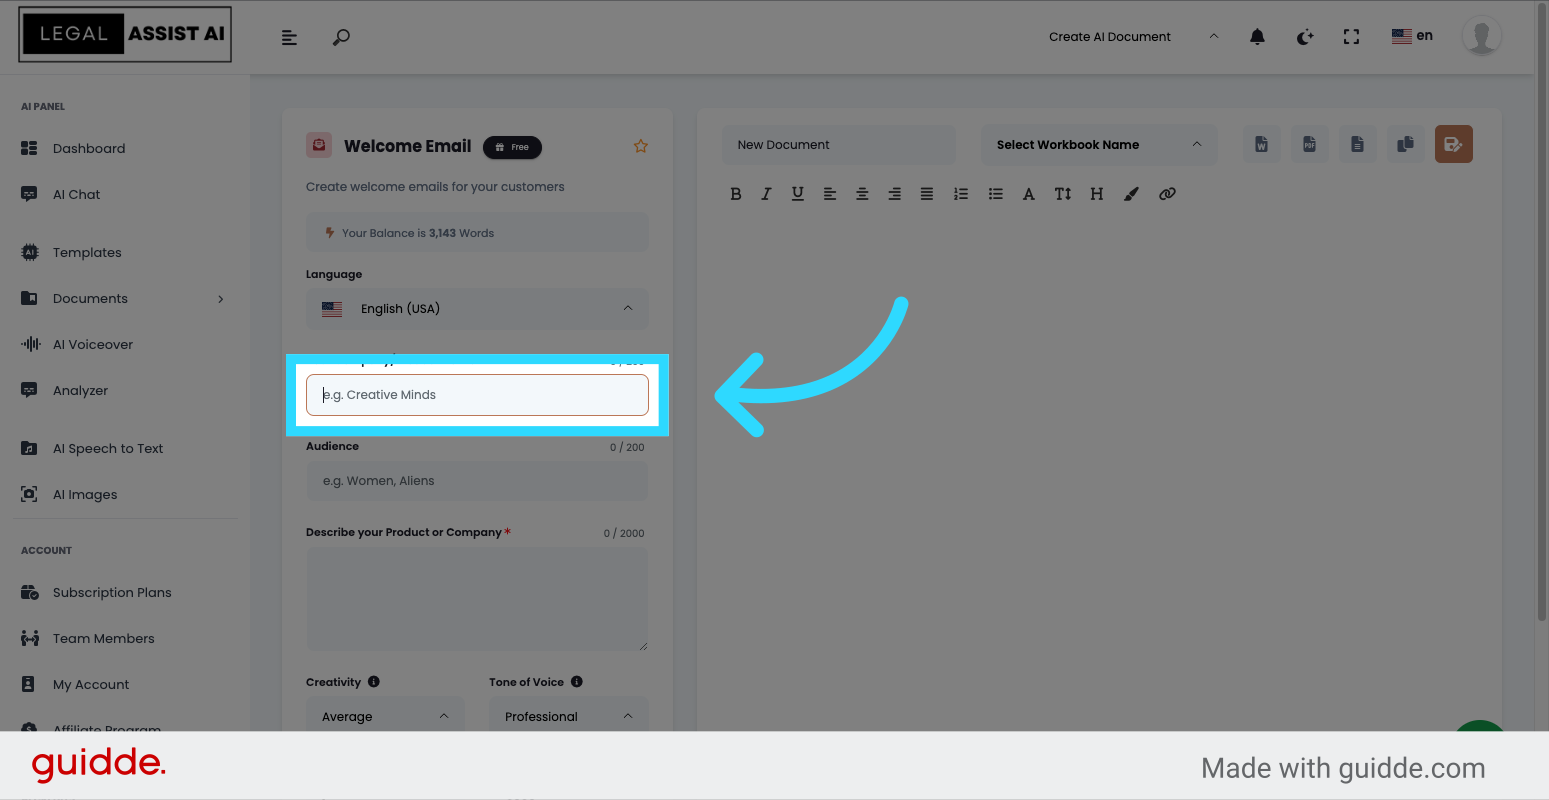
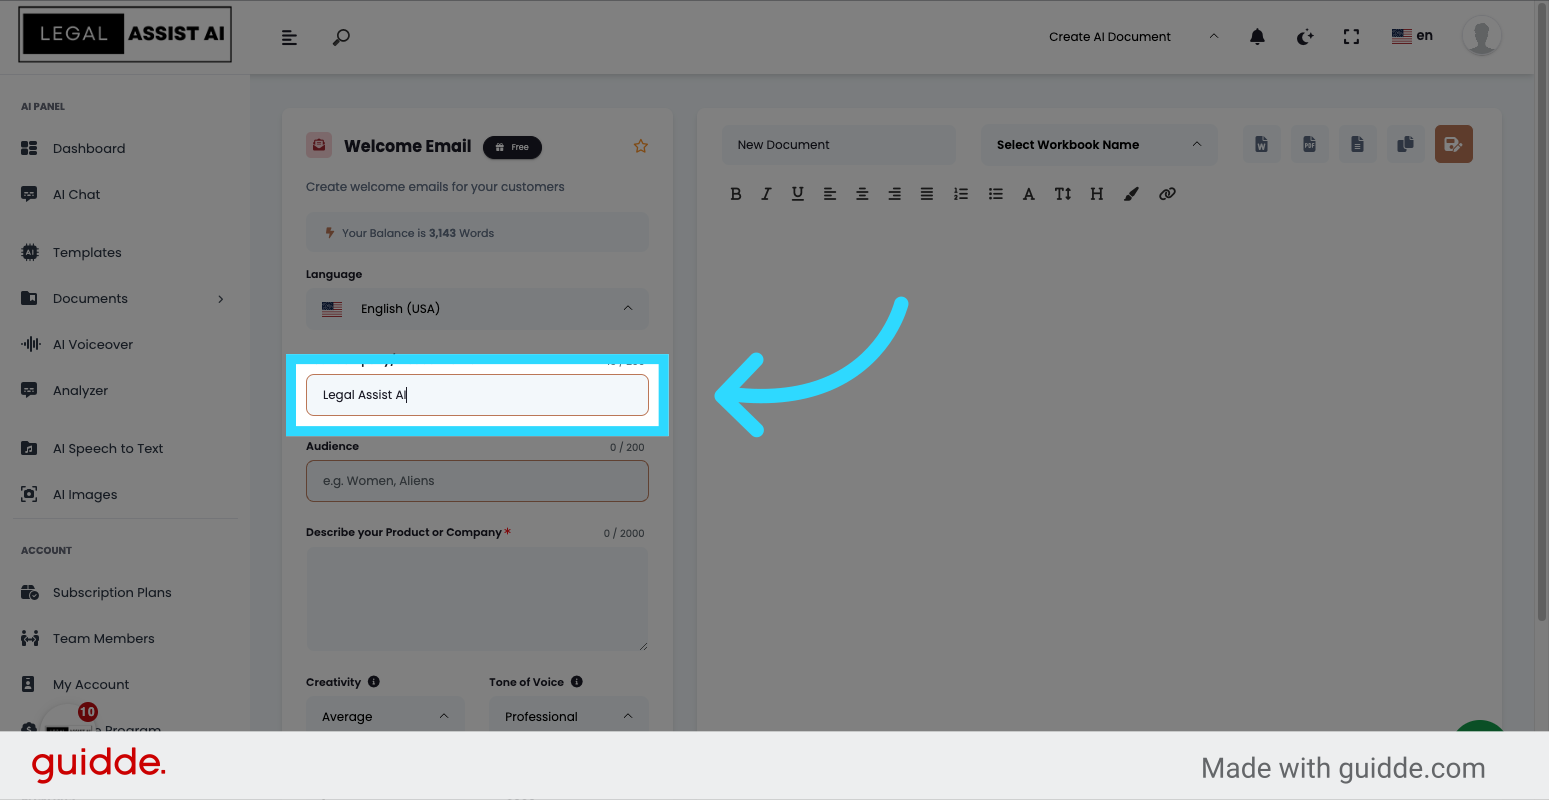
9. Click Your Company/Product Name
Click on the specified area and enter Your Company or Product Name
10. Fill “Legal Assist AI”
Enter the desired text, such as “Legal Assist AI”, in the specified field.
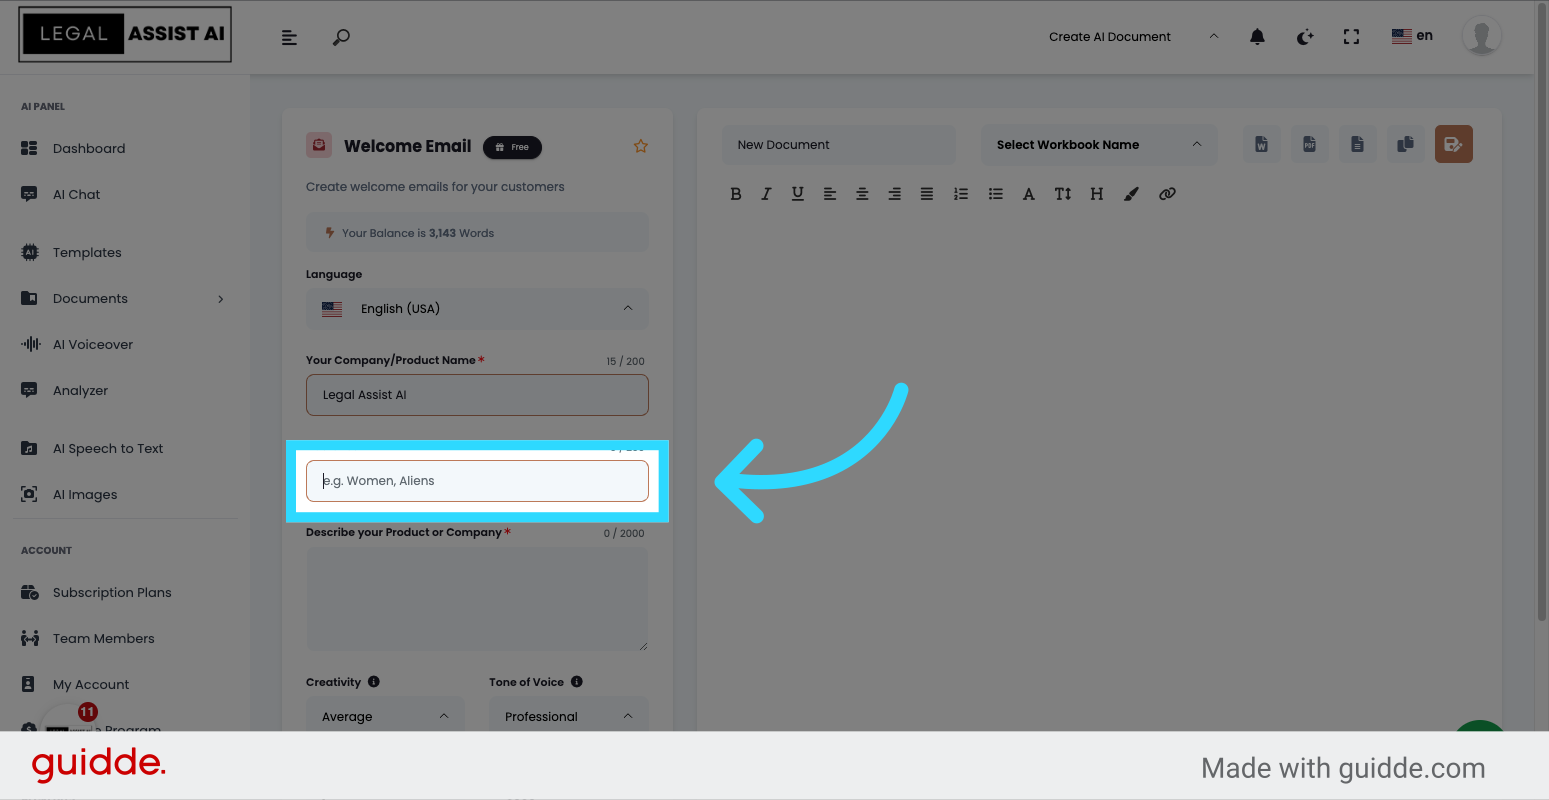
11. Click “Lawyer”
Click on the Audience area and enter the desired text, such as “Lawyer”.
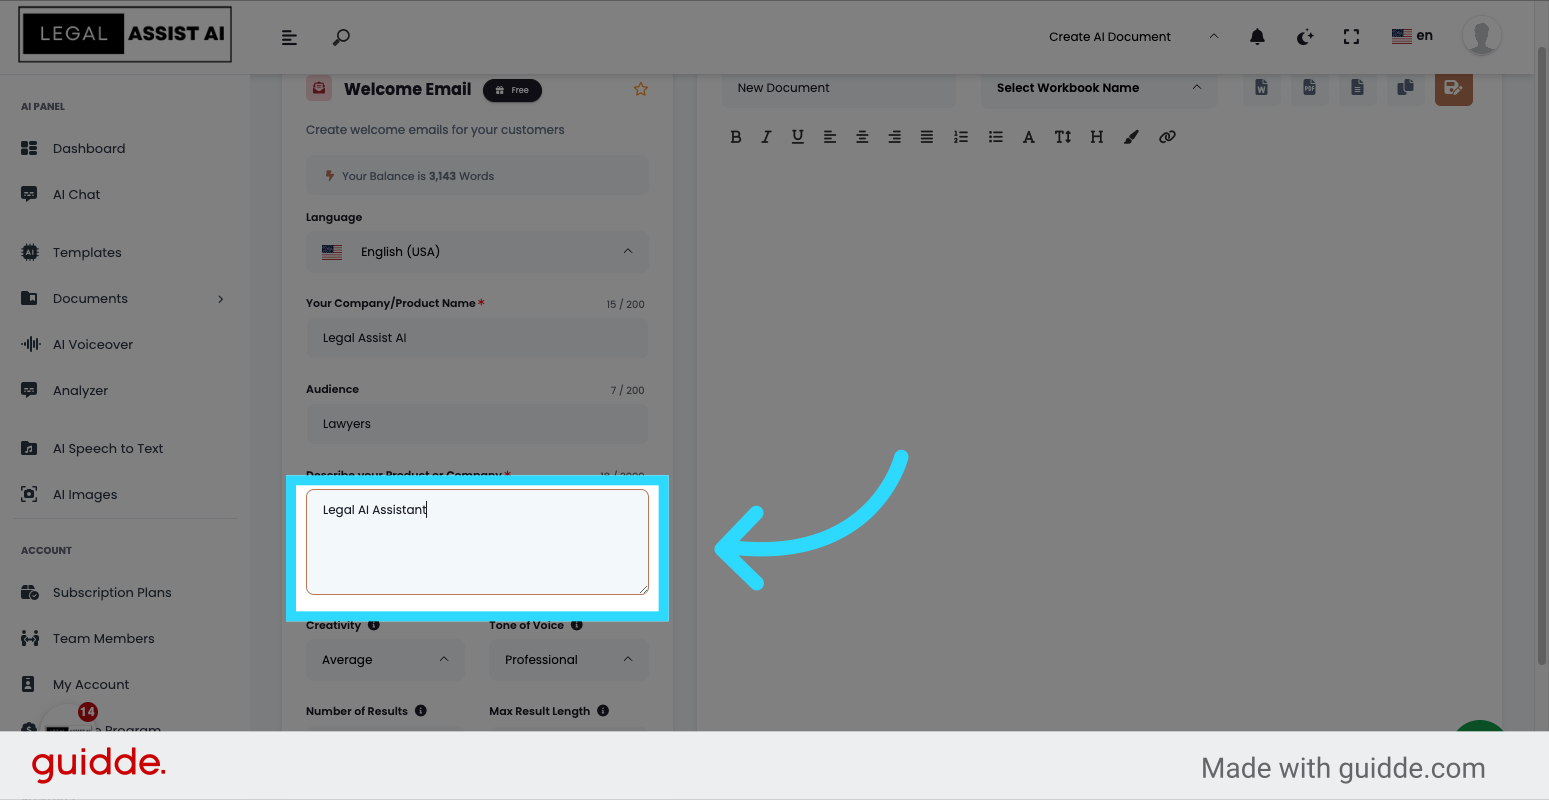
12. Fill “Legal AI Assistant”
Enter text in the describe your product or company field, such as “Legal AI Assistant”, in the specified field.
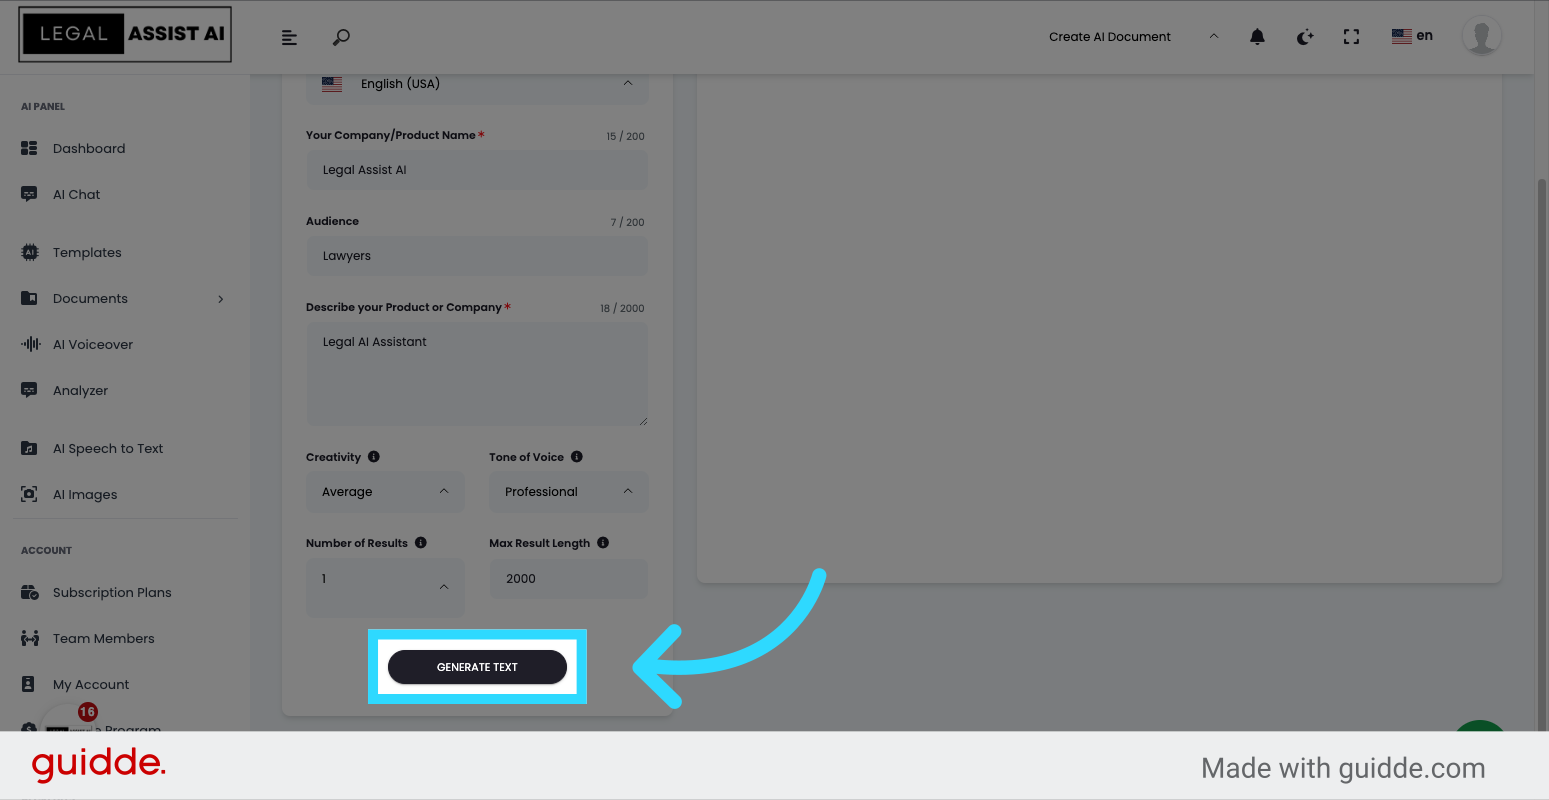
13. Click “Generate Text”
Click on the “Generate Text” button to generate the email content.
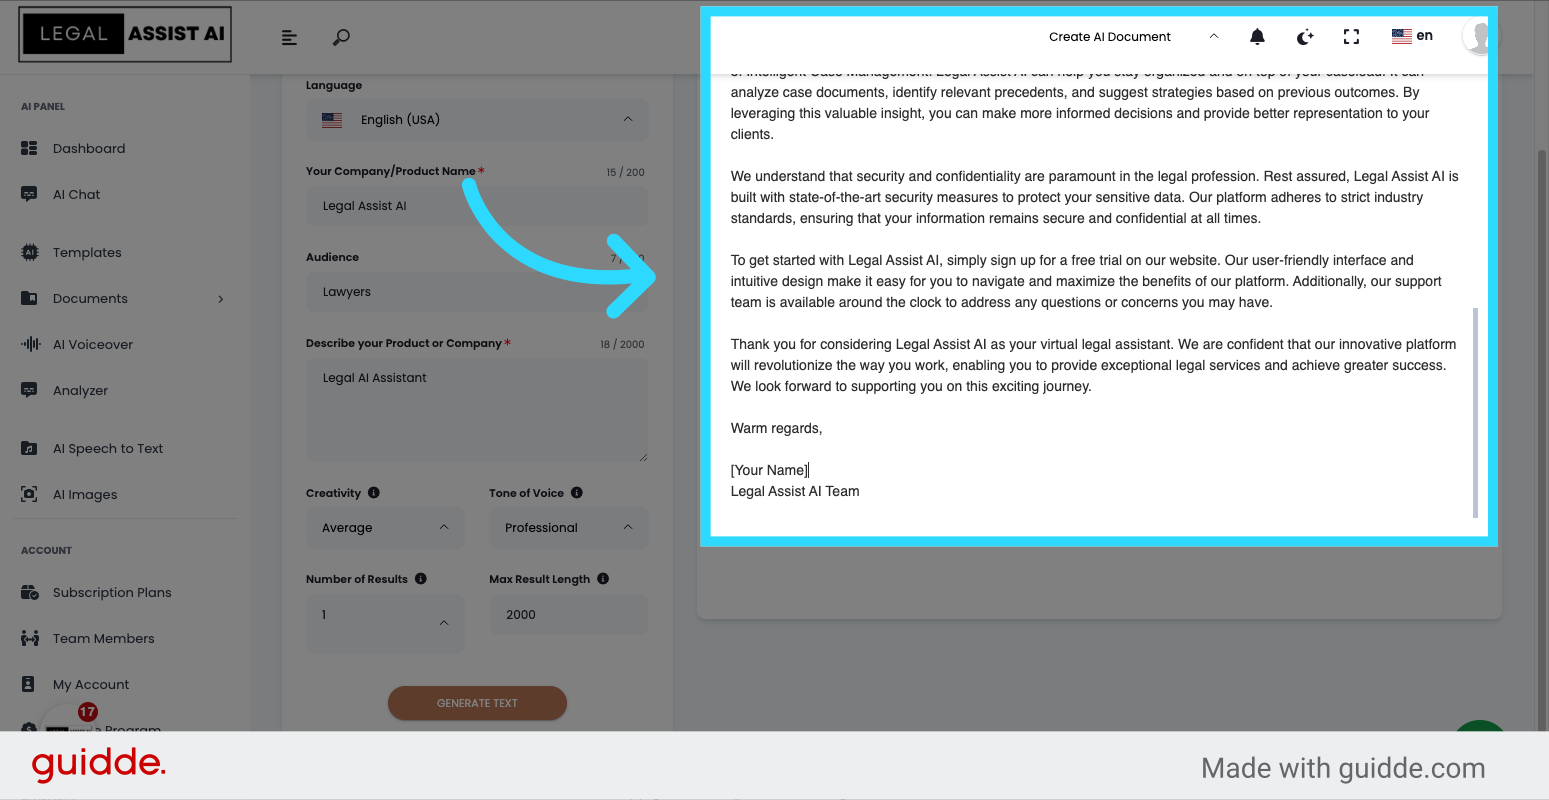
14. Review your results and update any information as needed
Review your results and update any information as needed
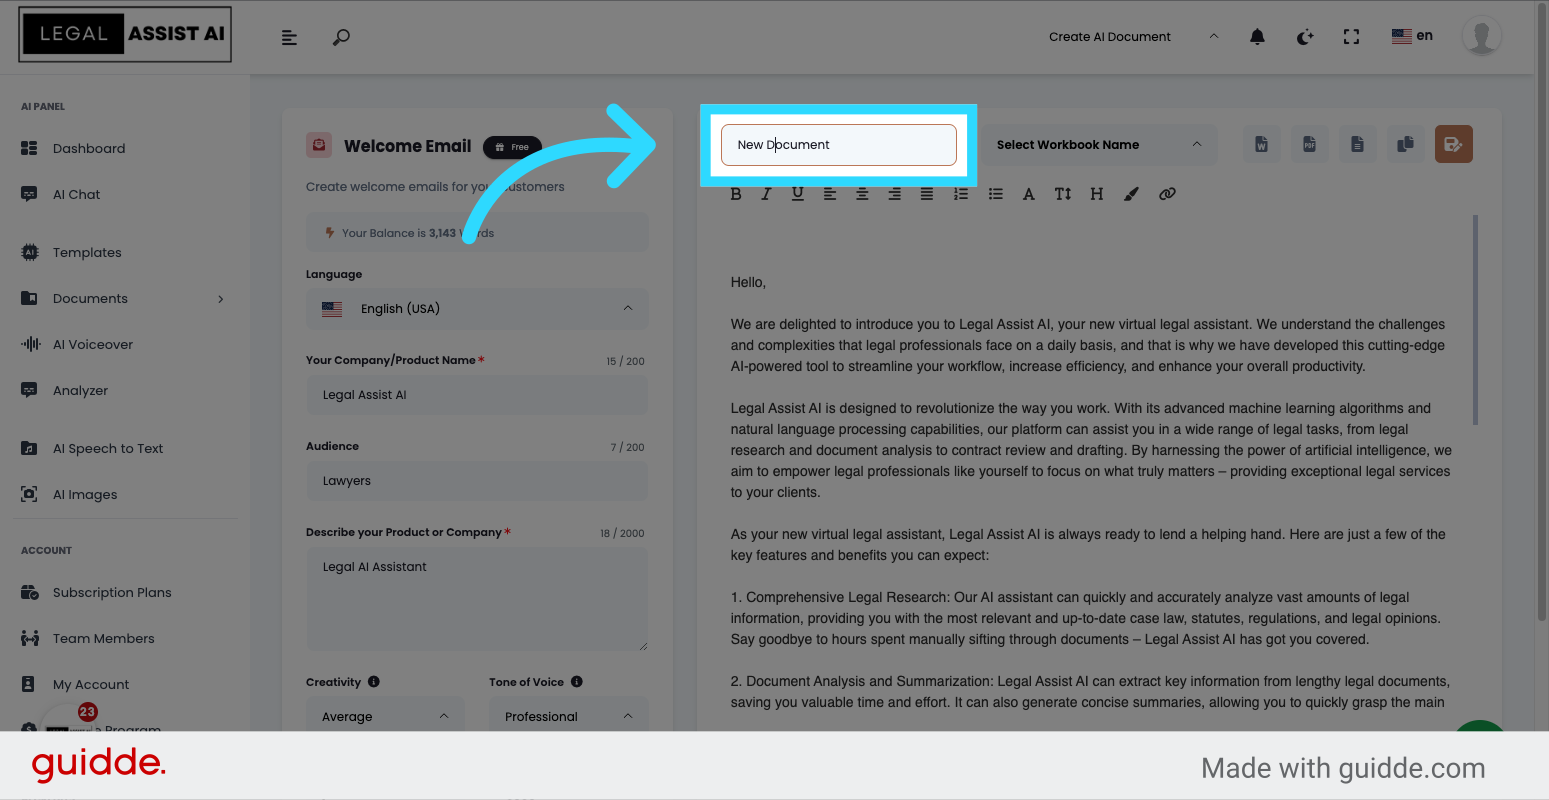
15. “Name Document”
Click on the “New Document” option to name the new document.
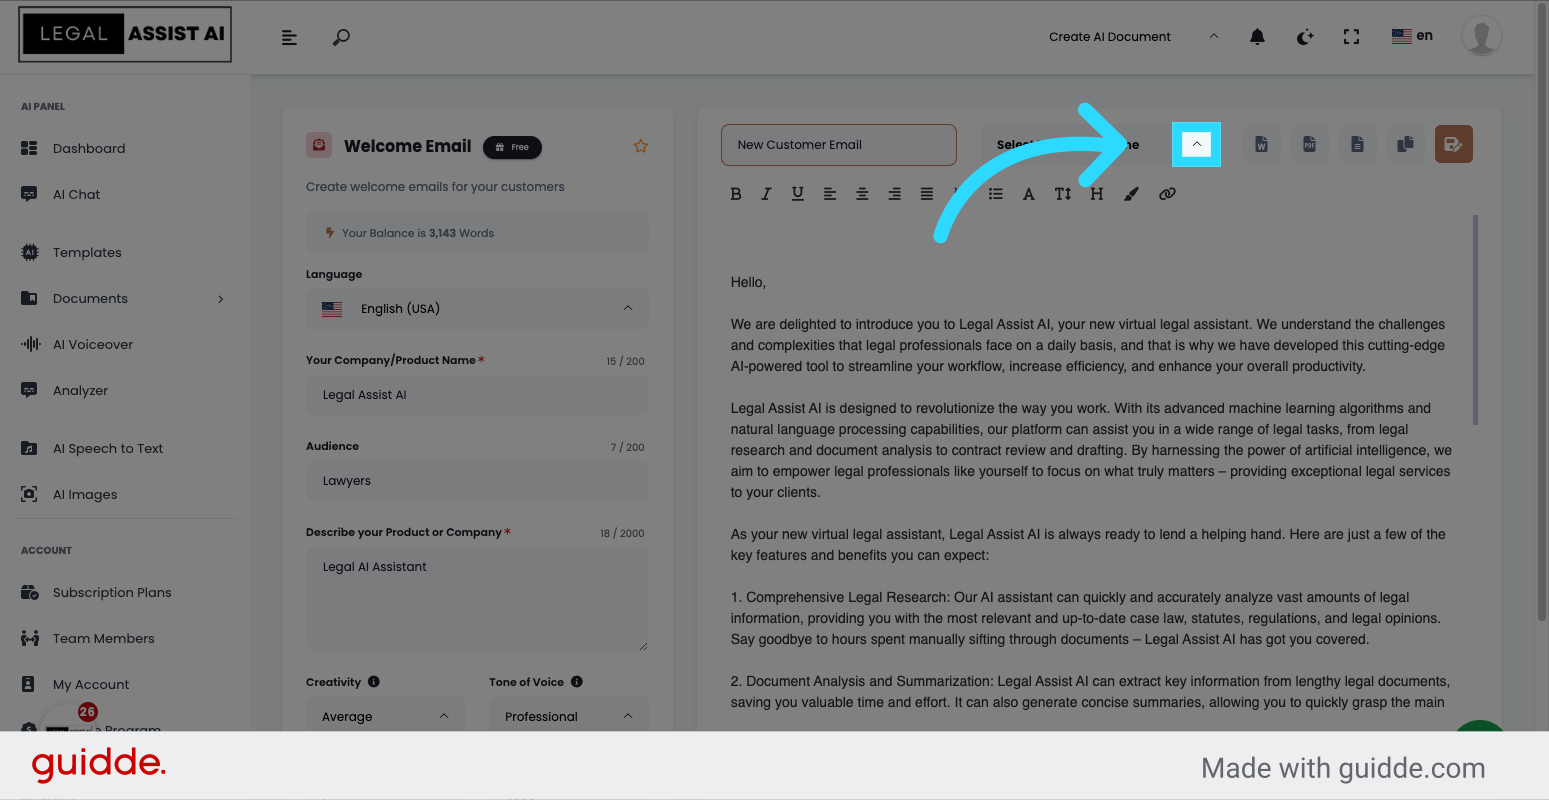
16. Click to see available workbooks
Select the dropdown box next to select workbook
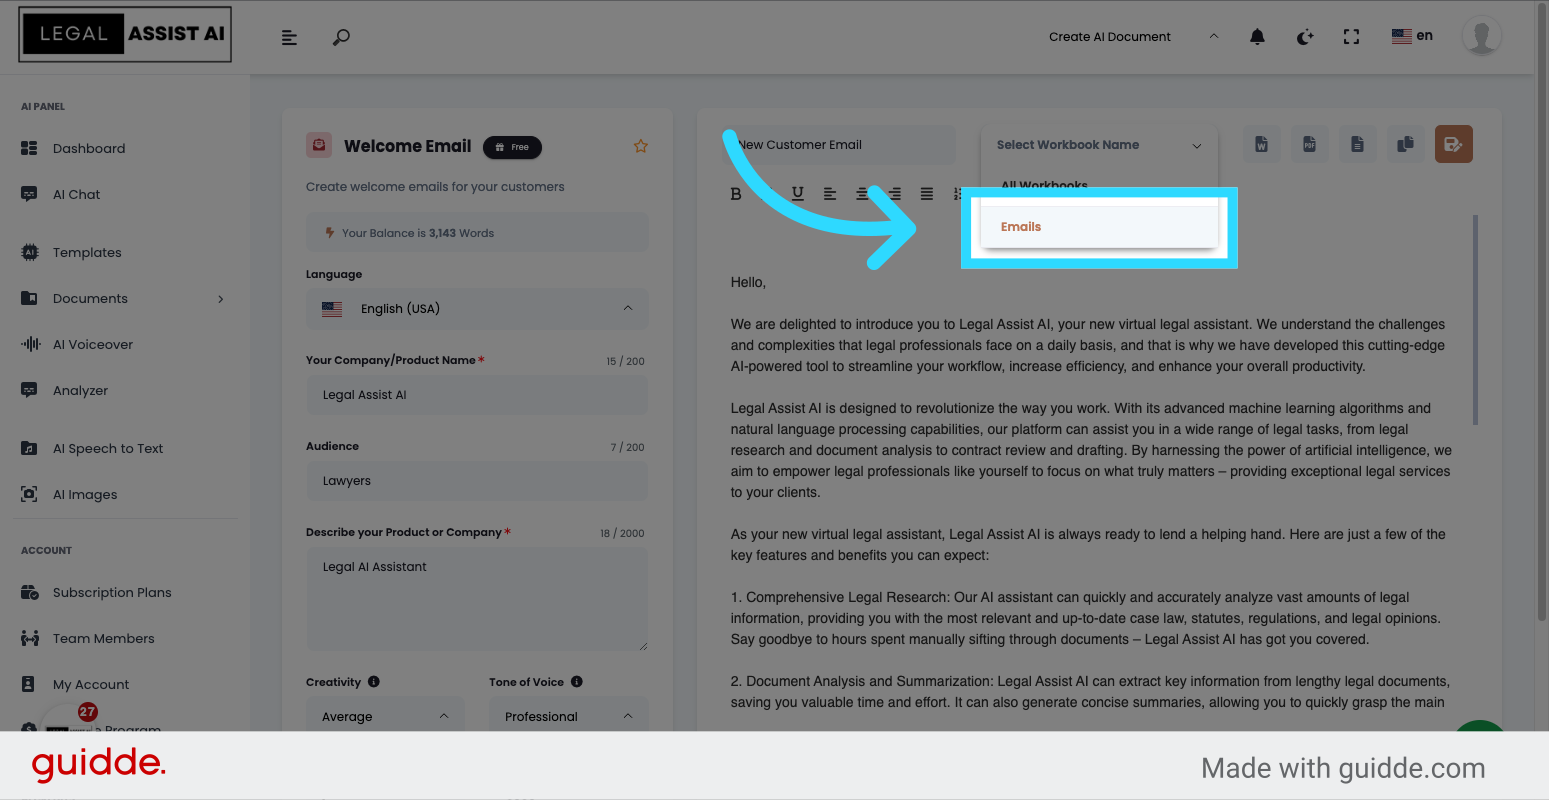
17. Click “Emails”
Click on “Emails”, which is the workbook you created. This will be the workbook the new document will be saved in
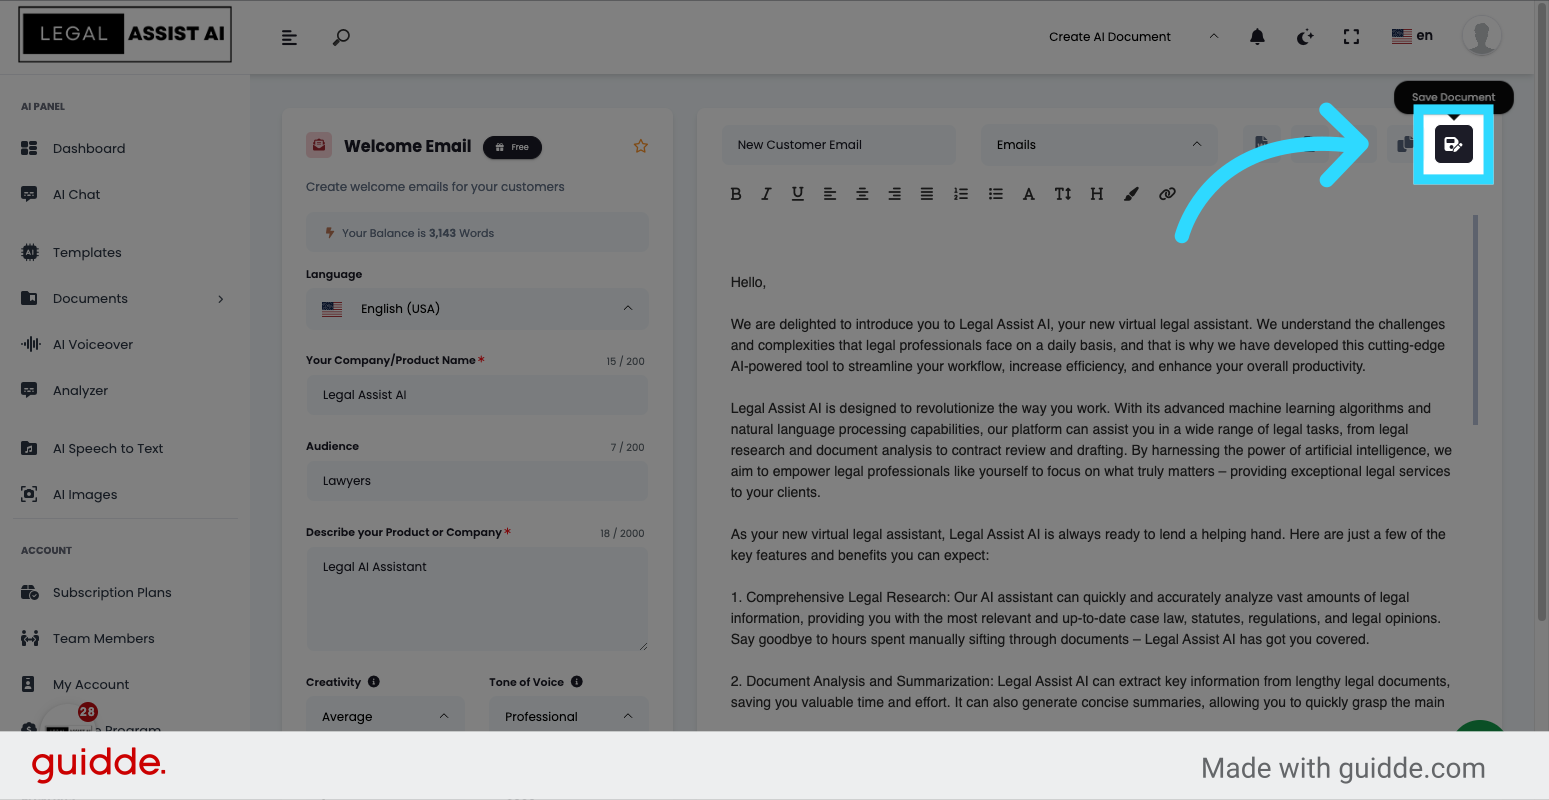
18. Click to save the document in the selected workbook
Navigate to this section and click save
19. Click “Documents”
Now click on the “Documents” tab to access your workbooks.
20. Click “Workbooks”
Next, click on the “Workbooks” option from the menu.
21. Click here
Select the workbook you created and the document will show in the results window. It can be reviewed and further edited if required/
In this guide, you learned how to access workbooks, create templates, and generate customized emails using Workbooks in Legal Assist AI. By following these steps, you can streamline your workflow and improve efficiency in managing your legal documents and communication with clients.
Open in App